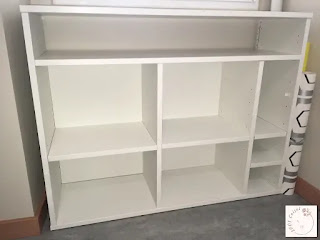
After taking the measurements of the space I tried to visualize what kind of storage would work best, I have plenty of drawers already on my sewing table, so those where out of the question. I wanted something to store fabrics, and that allowed me to store boxes where I put the material for the projects that I'm working on.
After some thought, I decided that the best option would be an open shelving unit where I could put boxes that I can easily take out. I remembered that Ikea had a system designed for kids rooms that have sliding boxes (trofast), and that was similar to what I wanted, the only problem is that the dimensions of this units didn't fit my space. So I thought that I would buy something that fit the space and add the sliding boxes.
Turns out it was not so easy to find a shelving unit with the measurements I needed, I could compromise in height but not on width, because I wanted to maximize the space and depth because it had to fit in the nook, so then I started thinking why not do it myself? There was just a slight problem with that, the cost of wood is high at the moment and the store didn't have a great selection, so this idea was shelved.

It was now time to make a plan of action, which I did but as it seems to always happen to me, I had to adjust it along the way, I ditched the idea of using the sliding boxes from Ikea, the boxes wasted to much space as they have round bottoms and wide rims.
The first stage was to disassemble the shelving unit, I decided to keep the lateral panels of the shelving unit, but had to shorten them a few centimeters, they were too high, the shelves of the unit I decided to use to make two dividers, the top and bottom of the unit where used to make shelves, the wardrobe shelves I used to make the top, bottom, and one shelf and the rest of the wood I used to make the back and I still have a piece to make more shelves later on, once I've used it a bit and see what works best.
To assemble the structure I used dowels and screws that I add left over from other furniture, I was quite pleased with the result because it was the first time that I made something with this system and I was afraid to mess the alignment and end up with holes in the wrong place.
I used the attachment system of the original unit shelves to secure the partitions to the bottom and the top shelf, so they stay in place without having to use screws; this also allows me to easily take them out later if I want to.
The unit was done, it was time to try to fix the damage that one of the lateral panels had, I used silk paper and glue to fill in the hole and cover the particle board that was visible, sanding lightly and adding a touch of paint between layers of paper, the last paper layer extended beyond the damage and finished with paint. It is still noticeable but only if you look closer.


No comments:
Post a Comment